Recipes
How to Make Cheese at Home: Easy Homemade Cheese From Milk
There’s something quietly magical about watching milk turn into cheese in your own kitchen. One minute you’ve got a pot of plain milk, and fifteen minutes later, you’re lifting soft white curds into a cloth. It feels like a science experiment that you get to eat.
Here’s the best part: making cheese at home is far easier than most people think. You don’t need a cheese cave, special equipment, or years of training. For fresh cheeses like paneer, ricotta, and quick mozzarella, all you need is milk, an acid (like lemon juice or vinegar), a pot, and a bit of patience.
In this guide, you’ll learn the basic science behind it, the ingredients and tools you need, three beginner-friendly recipes, and how to fix things when they go sideways (because sometimes they will, and that’s okay).
How Does Milk Turn Into Cheese?
Milk is mostly water, with fat, sugar (lactose), minerals, and proteins. The main proteins are caseins, which float around in tiny clusters called micelles. When you add acid or an enzyme called rennet, and usually heat, the casein proteins clump together and separate from the liquid.
The solid clumps are curds (cheese), and the leftover liquid is whey.
There are two main routes for this:
- Acid-set cheese: Adding lemon juice, vinegar, or citric acid makes milk curdle. Paneer, ricotta, queso fresco, and cottage cheese-style curds work this way.
- Rennet-set cheese: Rennet creates a firmer, stretchier curd. This is how mozzarella and many aged cheeses are made.
Aged and ripened cheeses like cheddar and parmesan also involve bacterial cultures and months of aging, so they’re a different, more advanced project. For this article, we’re staying with fresh cheeses you can make in an afternoon.
What You Need
Choosing Your Milk
This matters more than anything else.
- Use whole (full-fat) milk for the best yield and creamy texture. Skim milk gives dry, crumbly cheese with a much lower yield.
- Avoid UHT (ultra-high-temperature) milk. The intense heating damages proteins so they don’t curdle properly, especially for rennet cheeses. Check the label.
- Pasteurized milk works well for most recipes. Standard pasteurized, non-homogenized milk is ideal for mozzarella, but regular homogenized pasteurized milk works for paneer and ricotta.
- Buffalo milk makes especially rich paneer and is commonly used in India.
- Fresh milk from a local dairy is wonderful, but boil or properly pasteurize it first for safety. Raw milk can carry harmful bacteria such as Listeria, E. coli, and Salmonella. Young children, pregnant women, older adults, and anyone with weakened immunity should avoid raw milk products. You can read more about safe handling at the CDC’s raw milk page.
Basic Equipment
- A heavy-bottomed pot (stainless steel or enamel; avoid reactive metals like aluminum for acidic ingredients when possible)
- A slotted spoon or skimmer
- A fine strainer, colander, or sieve
- Muslin cloth, cheesecloth, or a clean, thin cotton kitchen towel
- A thermometer (a digital kitchen thermometer takes the guesswork out)
- A bowl to catch the whey
- A heavy weight (a pan, or a jar of water) for pressing paneer
Acids and Coagulants
- Lemon juice: Gives a mild lemony flavor.
- White vinegar: Neutral flavor, very reliable.
- Citric acid: Neutral and consistent; sold in grocery stores and online.
- Rennet: Liquid or tablets. Look for vegetarian rennet if you avoid animal products.
- Salt: For flavor and texture. Use non-iodized salt if possible.
Recipe 1: Homemade Paneer (The Easiest Cheese Ever)
Paneer is India’s most beloved fresh cheese: firm, mild, and perfect for curries, tikkas, and sandwiches. It doesn’t melt, so it holds its shape in hot dishes. If you’ve been buying it from the store, you’ll be amazed how much better homemade tastes.
Yield: About 150 to 200 grams
Time: 30 minutes active, plus 30 to 60 minutes pressing
Ingredients
- 1 liter full-fat milk
- 2 to 3 tablespoons lemon juice or white vinegar (adjust as needed)
- A pinch of salt (optional)
Method
- Heat the milk. Pour the milk into a heavy-bottomed pot and bring it to a gentle boil over medium heat, stirring occasionally so it doesn’t scorch on the bottom.
- Turn off the heat. Once the milk starts to foam and rise, switch off the flame. Let it sit for about a minute.
- Add the acid. Stir in the lemon juice or vinegar slowly, one tablespoon at a time. Within seconds, you’ll see curds separate from a pale yellow-green whey. If the whey is still milky, add another teaspoon or two of acid and stir gently.
- Rest. Let it sit undisturbed for 5 to 10 minutes so the curds firm up.
- Strain. Line a colander with muslin and place it over a bowl. Pour in the curds and whey. Save the whey, because it’s great for kneading dough or adding to soups.
- Rinse. Run cool water over the curds for a few seconds to remove the lemon or vinegar taste and stop cooking.
- Squeeze and shape. Gather the corners of the cloth, twist, and gently squeeze out extra liquid.
- Press. Flatten the bundle on a plate, put another plate on top, and add a weight (a heavy pan or jar of water). Press for 30 minutes for soft paneer, or up to an hour or more for firm paneer that slices cleanly.
- Cool. Unwrap, and cut into cubes. Store submerged in cold water in the fridge.
Tips for Perfect Paneer
- Don’t add the acid while the milk is violently boiling, because it can make the curds tough.
- Use the minimum acid needed. Too much gives rubbery, sour paneer.
- Don’t over-press if you want soft, melt-in-the-mouth paneer.
- For extra-soft paneer, add a splash of cream or use buffalo milk.
- Use it within 3 to 4 days, kept in a container in the fridge, ideally in clean water that you change daily.
Recipe 2: Creamy Homemade Ricotta
Ricotta is soft, mildly sweet, and wonderfully versatile. Traditional ricotta is made from leftover whey, but this simplified version uses whole milk and works beautifully for lasagna, pasta, toast, pancakes, or desserts.
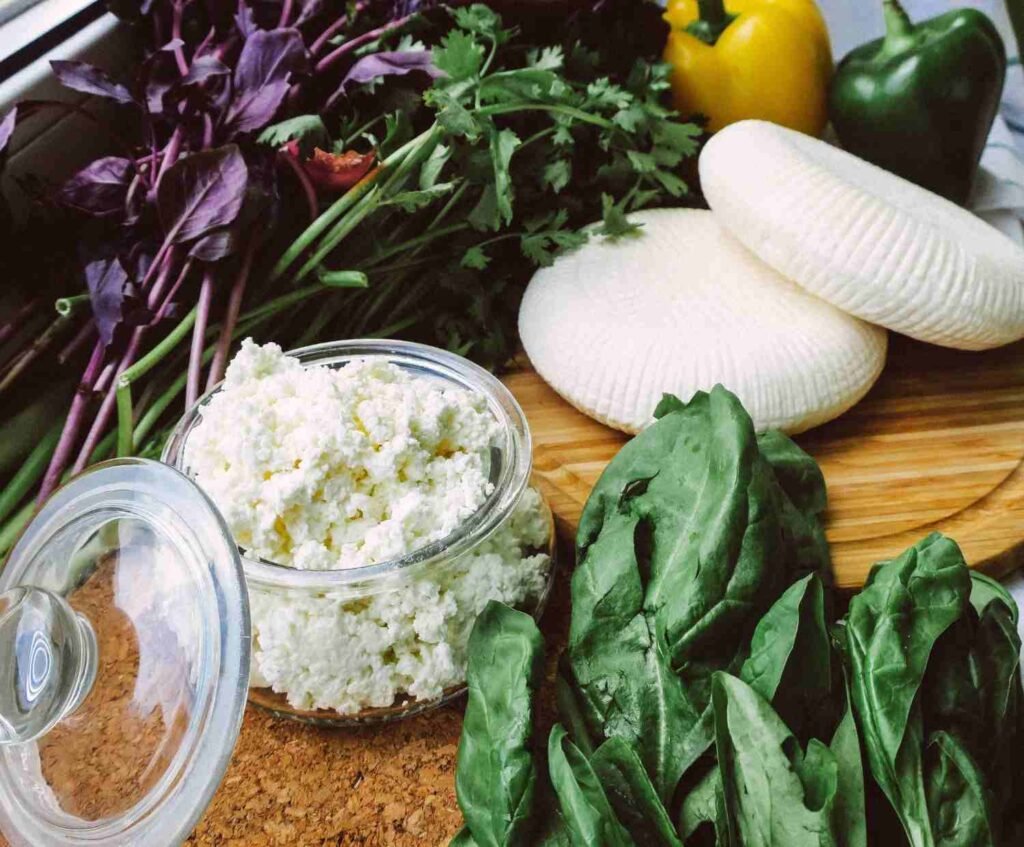
Yield: About 1 cup (200 to 250 grams)
Time: 30 minutes
Ingredients
- 4 cups (about 1 liter) whole milk
- 1 cup (about 240 ml) heavy cream or extra milk (cream gives a richer result)
- ½ teaspoon salt
- 3 tablespoons white vinegar or lemon juice
Method
- Combine and heat. In a heavy pot, mix the milk, cream, and salt. Heat over medium heat, stirring gently, until it reaches about 85°C (185°F). You’ll see steam and tiny bubbles around the edge, but it shouldn’t boil hard.
- Add acid. Remove from heat and pour in the vinegar or lemon juice. Stir once or twice, gently, then stop.
- Let it rest. Leave it undisturbed for 10 to 15 minutes. Curds will rise and clump together.
- Strain. Line a strainer with muslin or a fine cloth over a bowl. Use a slotted spoon to ladle in the curds.
- Drain to your liking. Drain for 5 minutes for creamy, moist ricotta, or 15 to 20 minutes for a firmer texture.
- Serve or store. Enjoy warm, or cool and refrigerate in an airtight container for up to 5 days.
Ways to Use Ricotta
- Spread on toast with honey and fruit
- Stuff into pasta shells or lasagna
- Mix with spinach for a filling
- Stir into pancake batter for extra softness
- Blend with herbs and garlic for a dip
Recipe 3: 30-Minute Mozzarella
This one feels like real cheese-making. You’ll get stretchy, milky mozzarella that melts beautifully on pizza. It requires rennet and citric acid, but it’s still beginner-friendly.
Yield: About 200 to 250 grams
Time: About 45 minutes
Ingredients (for about 2 liters of milk)
- 2 liters whole milk (not UHT)
- ¾ teaspoon citric acid, dissolved in ¼ cup (60 ml) cool, unchlorinated water
- ⅛ teaspoon liquid rennet (or ¼ of a rennet tablet), dissolved in ¼ cup cool, unchlorinated water
- 1 to 2 teaspoons salt, plus extra for brine if you like
Note: Chlorinated tap water can weaken rennet, so use bottled or boiled-and-cooled water if your tap water is treated.

Method
- Acidify the milk. Pour the cold milk into a large pot and stir in the citric acid solution.
- Warm gently. Heat slowly to about 32°C (90°F), stirring now and then. The milk may begin to look slightly curdled, and that’s normal.
- Add rennet. Remove the pot from the heat, add the diluted rennet, and stir gently with an up-and-down motion for about 30 seconds.
- Let it set. Cover and leave completely undisturbed for 5 to 10 minutes. The milk should set into a solid, custard-like curd that breaks cleanly when you slide a knife in. If it’s still soft, wait a few more minutes.
- Cut the curd. Slice the curd into a grid of roughly 2 cm (¾ inch) squares, reaching the bottom of the pot.
- Cook the curds. Return to low heat and warm the curds slowly to about 40°C (105°F), stirring gently. The curds will shrink and release yellowish whey.
- Drain. Use a slotted spoon to lift the curds into a heatproof bowl. Press out as much whey as you can.
- Heat and stretch. Heat the curds in hot whey or very hot water, around 80°C (175°F), or in short microwave bursts, until they’re hot and pliable. Wear heat-resistant gloves, because it’s hot. Stretch and fold the curd like taffy until it becomes smooth and shiny. Add salt as you stretch.
- Shape and chill. Form into balls and drop them into ice water for a few minutes so they hold their shape.
- Store. Keep in the fridge in a little salted whey or brine, and eat within about 5 to 7 days for best quality.
Mozzarella Tips
- If your curd is too soft, the milk might be UHT or too old. Try fresh pasteurized, non-UHT milk.
- If the cheese turns rubbery, you’ve likely overheated or overworked it.
- Homemade mozzarella is best fresh, and it’s stunning in a caprese salad or on a homemade pizza.
Troubleshooting Common Cheese-Making Problems
Don’t be discouraged if your first batch isn’t perfect. Here’s how to fix common issues:
Milk won’t curdle.
Check that your milk isn’t UHT and that it’s hot enough. Add a little more acid, a teaspoon at a time.
Cheese is rubbery or tough.
You may have used too much acid, heated too fast, or pressed it too long. Use a bit less acid next time, and take it off the heat gently.
Cheese is dry or crumbly.
Low-fat milk or over-pressing is the usual cause. Use whole milk and reduce pressing time.
Very small yield.
Milk with lower fat and protein produces less cheese. Whole milk gives about 10 to 20 percent of the milk’s volume as cheese, depending on the type.
Cheese tastes sour or bitter.
Too much lemon juice or vinegar is typical. Rinse the curds in cold water, and use less acid next time.
Mozzarella won’t stretch.
The curds weren’t hot enough, or the milk’s pH wasn’t right. Make sure you’re heating the curd to the right temperature and try again with fresh milk.
What to Do With the Whey
Don’t pour it down the drain. Whey contains protein, minerals, and a mild tang. You can:
- Knead it into roti or bread dough
- Use it in place of water to cook rice or lentils
- Add it to smoothies or soups
- Use it to cook pasta
- Feed it to plants, which like the acidity, in diluted form (acid whey is best diluted)
Whey from acid-set paneer is more acidic than sweet whey from rennet cheese, so adjust your uses accordingly.
Food Safety Basics
Cheese is a perishable, moisture-rich food, so basic hygiene matters:
- Wash your hands, tools, and cloths thoroughly. Boil muslin cloths before use.
- Use pasteurized milk, or heat raw milk to a safe temperature first.
- Keep the finished cheese in the fridge at 4°C (40°F) or below.
- Discard cheese that smells off, feels slimy, or shows mold. For fresh cheeses, there’s no cutting off the moldy bit.
- Eat fresh cheeses within a few days and mozzarella within about a week.
The USDA Food Safety and Inspection Service offers solid, easy-to-follow guidance on safe food handling.
Is Homemade Cheese Healthy?
Fresh cheeses like paneer, ricotta, and mozzarella are good sources of protein and calcium, and when you make them yourself you control what goes in: no preservatives, no stabilizers, no mystery additives. They’re also lower in sodium than many packaged versions, since you decide how much salt to add.
Keep portions sensible, because cheese can be high in saturated fat and calories. A palm-sized portion is plenty for most meals.
One thing worth knowing: acid-set cheeses like paneer and ricotta are not fermented foods and don’t contain live probiotics. If you’re interested in gut-friendly foods, our guide to the best fermented foods for gut health explains which foods do, such as yogurt, kefir, and aged cheeses.
Going Further: Where to Go After Beginner Cheeses
Once you’ve mastered the basics, you might feel adventurous. Next steps include:
- Cottage cheese: Add a mesophilic culture or acid, cut curds, and rinse.
- Queso fresco: Similar to paneer but softer and often with a mild tang.
- Cream cheese or labneh: Hang yogurt in cloth overnight for thick, spreadable cheese, one of the easiest cheeses you can make.
- Halloumi: A firm, brined cheese that grills beautifully, made with rennet and a simmer in whey.
- Aged cheeses: Cheddar, gouda, and parmesan need cultures, rennet, presses, controlled humidity, and months of aging. If you decide to go down that route, buy a proper cheese-making kit and books from reputable suppliers. The New England Cheesemaking Supply Company is a well-known resource with recipes and guides.
Quick Recap: Which Cheese Should You Make First?
- Want something easy and useful for Indian cooking? Start with paneer.
- Want something soft and creamy for toast, pasta, or desserts? Make ricotta.
- Want the fun of stretching cheese like a pro? Try mozzarella.
Whichever you pick, buy good whole milk, keep your equipment clean, don’t rush the heating, and write down what you did so you can adjust the next time.

Final Thoughts
Homemade cheese is one of those kitchen projects that rewards you quickly. You get fresh, delicious food, you waste less milk, and you learn something about how food works. It also makes a great weekend activity with kids, who tend to be fascinated by curds and whey.
Don’t aim for perfection on your first try. Aim for curiosity. Your first paneer might be a bit crumbly or your first mozzarella a little tough, but it’ll still taste better than you expect, and every batch teaches you something new. So grab a liter of milk, a lemon, and a pot, and give it a go.