Recipes
How to Make Kimchi at Home: Easy Step-by-Step Recipe
How to Make Kimchi at Home: Easy Recipe
The first time you open a jar of homemade kimchi, something wonderful happens. A tangy, garlicky, slightly spicy smell fills the kitchen, and you realize you made this. It didn’t come from a shop shelf. It came from a head of cabbage, some chili flakes, and a few days of patience.
Kimchi has a reputation for being intimidating. Long ingredient lists, unfamiliar terms, and the idea of intentionally letting vegetables ferment can feel like a lot. But honestly, it’s one of the more forgiving projects you can try. Once you understand the basic steps, you can make a batch with confidence, and tweak it to suit your own taste.
This guide walks you through a classic napa cabbage kimchi (called baechu-kimchi), with clear measurements, simple swaps for vegetarians and vegans, tips for the best flavor, and answers to the questions everyone asks.
What Is Kimchi?
Kimchi is Korea’s famous fermented vegetable dish, traditionally made with napa cabbage and radish seasoned with chili, garlic, ginger, and salty umami ingredients. It’s been part of Korean meals for centuries and comes in hundreds of varieties.
The magic is lactic acid fermentation. Naturally occurring bacteria on the vegetables thrive in a salty, low-oxygen environment, converting sugars into lactic acid. That’s what gives kimchi its signature tang and also helps preserve it. If you’re curious about the gut-health side of fermented foods, read our explainer on what postbiotics are.
Why Make Kimchi at Home?
- It’s cheaper. A big jar costs a fraction of store-bought.
- You control the spice and salt. Make it mild or fiery.
- Fresher flavor. You choose how sour you want it.
- Customizable. Vegan, gluten-free, low-sodium? No problem.
- It’s satisfying. There’s real joy in watching a jar bubble on your counter.
Ingredients You’ll Need
This recipe makes about one large 2-liter jar (roughly 8 to 10 servings as a side dish).
For Salting the Cabbage
- 1 large napa cabbage (about 1.5 to 2 kg or 3 to 4 pounds)
- ½ cup coarse sea salt (non-iodized; fine salt will make it too salty)
- Water for rinsing and soaking
For the Porridge Base (helps the seasoning stick and feeds fermentation)
- 2 tablespoons sweet (glutinous) rice flour
- 1 cup water
- 1 tablespoon sugar
Can’t find sweet rice flour? Use regular rice flour or even plain flour in a pinch.
For the Kimchi Paste
- ½ to ¾ cup Korean chili flakes (gochugaru), adjust to spice preference
- 8 cloves garlic, minced or grated
- 1 tablespoon fresh ginger, grated
- 3 tablespoons fish sauce (or soy sauce for vegetarian; see vegan swaps)
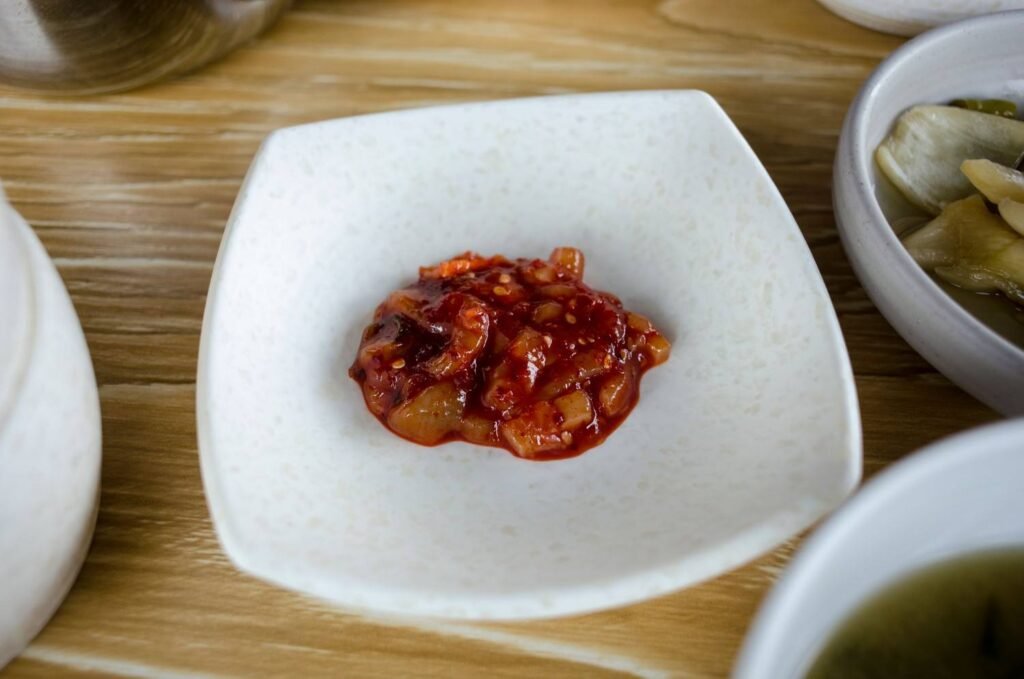
- 1 tablespoon salted fermented shrimp (saeujeot), optional
- 1 small onion, grated (optional, adds sweetness)
For the Vegetables
- 1 cup daikon radish or regular white radish, cut into thin matchsticks
- 1 medium carrot, cut into matchsticks
- 4 to 5 spring onions (scallions), cut into 2-inch pieces
Equipment
- A large bowl (or a clean basin)
- A medium saucepan
- Disposable gloves (highly recommended; chili burns!)
- A clean glass jar with a lid (about 2 liters)
- A plate or weight to press the vegetables down (optional)
Hygiene matters. Wash your hands, bowls, jars, and utensils thoroughly before you begin, since you want good bacteria to thrive and unwanted ones to stay away.
Step-by-Step Instructions
Step 1: Cut and Salt the Cabbage
- Remove any wilted outer leaves from the cabbage.
- Cut the cabbage in half lengthwise, then into quarters. Cut out the hard core, then chop the cabbage into bite-sized pieces about 2 inches wide.
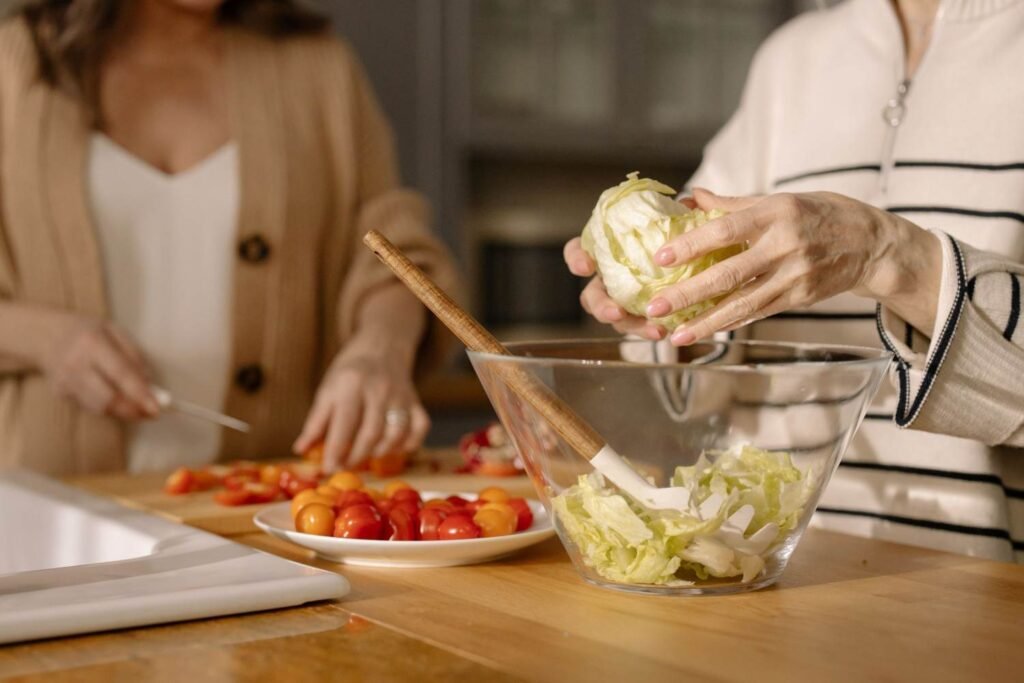
- Place the pieces in a large bowl and sprinkle the salt over them, working it between the leaves with your hands, focusing on the thick white parts.
- Add about ½ cup of water, mix, and let it sit for 1.5 to 2 hours, tossing every 30 minutes so the salt distributes evenly.
You’ll see the cabbage release a lot of liquid and become bendy. When you fold a thick piece, it should bend without snapping. That’s your cue.
Step 2: Rinse and Drain
Rinse the cabbage 2 to 3 times in cold water to remove excess salt. Taste a piece. It should taste pleasantly salty, like a well-seasoned soup, but not harsh. Drain well in a colander for about 30 minutes, and gently squeeze out extra water. Wet cabbage dilutes flavor and can make kimchi watery.
Step 3: Make the Porridge
While the cabbage drains:
- In a saucepan, whisk the rice flour with 1 cup of water over medium heat.
- Stir constantly until it thickens into a glue-like paste (about 3 to 5 minutes).
- Stir in the sugar, then cool completely.
Do not skip cooling, since hot porridge can ruin your fermentation environment.
Step 4: Prepare the Kimchi Paste
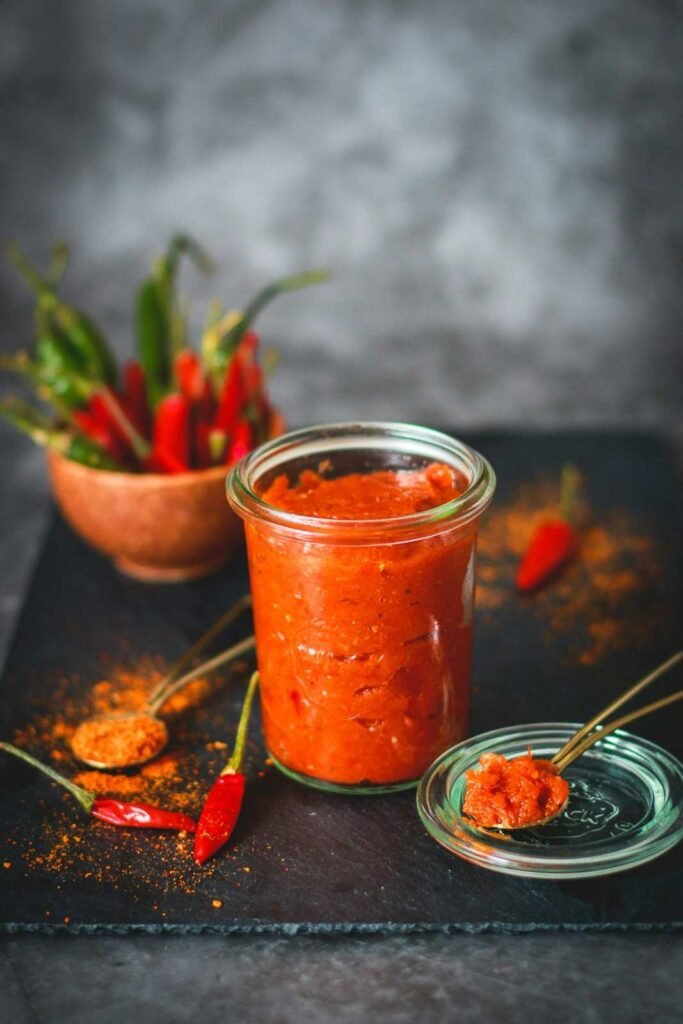
In a large bowl, combine the cooled porridge with the chili flakes, garlic, ginger, fish sauce, saeujeot (if using), and grated onion. Mix well until you have a thick, brick-red paste. Let it rest a few minutes so the chili flakes hydrate and the color deepens.
Step 5: Combine Everything
Put on gloves. Add the drained cabbage, radish, carrot, and spring onions to the paste. Massage the paste into every leaf, making sure all pieces are well coated. Taste a piece. This is the time to adjust:
- More salt or fish sauce if it tastes flat
- More chili for heat
- A touch more sugar if you want sweetness
Remember, flavors become stronger and sourer as it ferments, so keep it slightly bolder than you’d eat it fresh.
Step 6: Pack the Jar
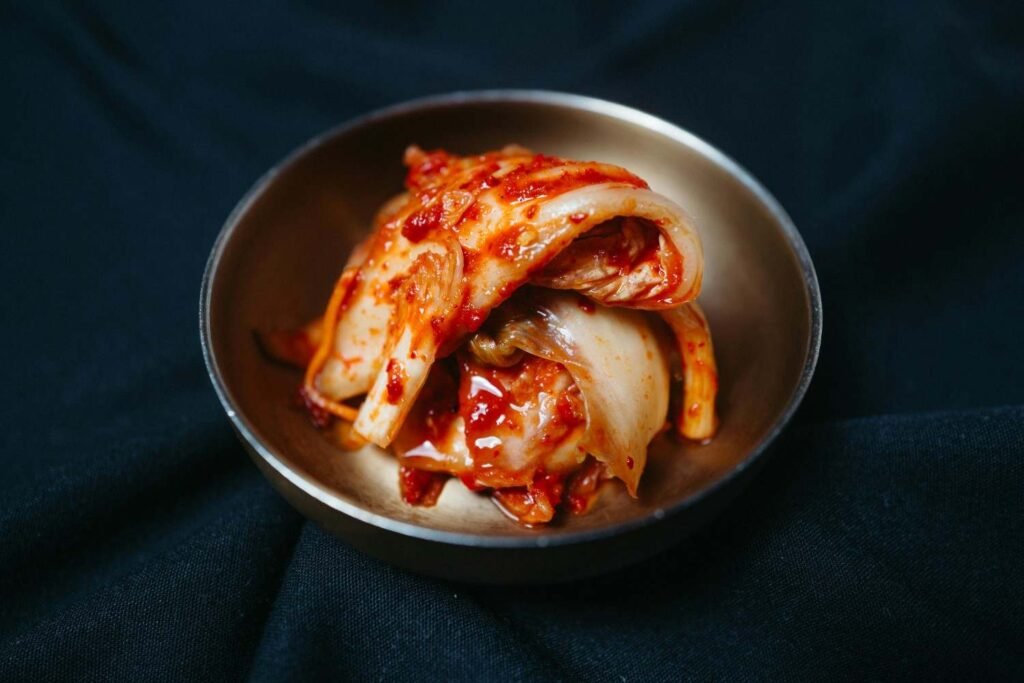
Pack the kimchi tightly into a clean glass jar, pressing down firmly with a clean spoon or your gloved hand to remove air pockets. Leave about 2 inches (5 cm) of space at the top, because kimchi bubbles and expands as it ferments.
Press the vegetables so the liquid rises above them. This brine is your protective layer. Wipe the rim of the jar clean.
Step 7: Ferment at Room Temperature
Close the lid loosely (or fit it without fully tightening) and set the jar on a plate to catch any overflow. Leave it at room temperature, away from direct sunlight, for 1 to 3 days.
- In warm weather (above 25°C or 77°F), it ferments faster, so check after 24 hours.
- In cooler weather, it may take 2 to 3 days.
Once a day, press the kimchi down with a clean spoon to release gas and keep everything submerged in brine. You may see bubbles, hear a gentle fizz, and notice a tangy smell. These are all good signs.
Step 8: Taste and Refrigerate
After a day or two, taste a small piece. Does it have a pleasantly sour tang and a bit of fizz? If yes, move the jar to the refrigerator. If not, leave it out another day and taste again.
Cold temperatures slow fermentation without stopping it. Your kimchi will continue to develop flavor over the next weeks.
How to Know When It’s Ready
There’s no single “correct” stage. People enjoy kimchi at different points:
- Fresh (day 1 to 2): Crunchy, lightly tangy, great as a salad-like side.
- Ripe (1 to 2 weeks in the fridge): Balanced, tangy, and deeply flavored. This is what most people love.
- Well-fermented (3+ weeks): Very sour. Perfect for cooking.
Trust your nose and taste buds. A clean, sour, spicy smell is a good sign.
Easy Variations and Swaps
Vegan Kimchi
Skip the fish sauce and shrimp. Replace them with:
- 3 tablespoons soy sauce or tamari, plus
- 1 tablespoon miso paste or a splash of rice vinegar for depth
- A strip of kombu (seaweed) soaked in water, if you like extra umami
- Some vegan kimchi recipes also use mushroom powder
Gluten-Free Kimchi
Use tamari instead of soy sauce, and check your gochugaru and fish sauce labels, since some brands contain wheat.
Mild Kimchi
Cut the gochugaru to ¼ cup for a gentle heat, or use mild chili flakes. You can also add a little grated apple or pear for sweetness.
Quick Kimchi (Geotjeori)
For a salad-style, no-ferment version, season the salted, rinsed cabbage with the paste and eat it right away. It’s fresh, crunchy, and ready in under three hours.
No Napa Cabbage?
You can use regular green cabbage, but expect a firmer texture, so salt it a little longer. Radish kimchi (kkakdugi) or cucumber kimchi (oi sobagi) are also great beginner alternatives.
What If I Can’t Find Korean Chili Flakes?
Gochugaru has a fruity, mildly smoky flavor that’s hard to replicate. If you can’t find it, mix:
- Mild paprika, plus
- A small amount of cayenne or crushed red pepper
Start with less cayenne and increase gradually. The flavor won’t be identical, but it will still taste great. Many Indian grocery stores and online retailers carry Korean chili flakes now, so it’s worth looking.
Tips for the Best Kimchi
- Use non-iodized salt. Iodized salt can interfere with fermentation.
- Keep vegetables submerged. Anything above the brine can spoil or grow mold.
- Don’t overfill the jar. Leave headspace for expansion.
- Use clean tools. Cleanliness prevents unwanted bacteria.
- Give it time. The longer it ferments, the more complex the flavor.
- Taste as you go. Fermentation is as much art as science.
- Use gloves. Chili residue on your hands stings for hours.
- Store in glass. Plastic can absorb odors and stains.
Troubleshooting Common Problems
My kimchi isn’t bubbling.
Be patient. Cool temperatures slow fermentation. Place it in a slightly warmer spot, and check again in a day. Make sure you didn’t over-salt, which can slow bacteria.
It’s too salty.
Next time, rinse the cabbage more thoroughly and reduce salt or fish sauce. For this batch, mix in extra radish or serve it with plain rice, tofu, or eggs.
It’s too sour.
It’s over-fermented, which isn’t harmful. Use it for cooking, such as kimchi stew (kimchi jjigae), fried rice, pancakes, or ramen.
There’s a white film on top.
A thin, flat white film is usually kahm yeast, which is harmless but can taste off. Skim it off and make sure the vegetables stay under the brine. Fuzzy, colored mold (green, black, pink, or blue) is different. If you see it, throw the batch away.
It smells strong.
Fermented foods have a strong aroma, but it should smell tangy and garlicky, not rotten or putrid. If it smells truly off, don’t eat it.
It’s watery.
Cabbage wasn’t drained well. Don’t worry, since the extra liquid is fine for soups and stews.
Jar overflowed.
Normal! Fermentation creates gas and liquid. Place the jar on a plate or tray while it ferments.
How to Store Kimchi
- Refrigerator: Keep in an airtight container. It stays good for 3 to 6 months, and often longer, getting more sour with time.
- Always use clean utensils. Don’t dip used spoons or chopsticks into the jar.
- Smell: Some people keep kimchi in a separate fridge or double-bag the jar to contain odor.
- Freezing: You can freeze it, but texture softens. This works best for cooking.
Ways to Eat Kimchi
Kimchi isn’t just a side dish. Try it:
- With steamed rice and a fried egg: Simple and comforting
- Kimchi fried rice: A classic, ready in 15 minutes
- Kimchi jjigae (stew): Hearty, spicy, and perfect for sour kimchi
- Kimchi pancakes (jeon): Crispy, savory, great with dipping sauce
- In grilled cheese or quesadillas: Surprisingly delicious
- On tacos, burgers, or sandwiches: A tangy, spicy topping
- In ramen or noodle bowls: Adds depth and heat
- Scrambled with eggs or tofu: A quick breakfast
- With dal and rice for an Indian-Korean fusion plate: Try it, you might be hooked
Is Kimchi Healthy?
Kimchi is made mostly of vegetables, so it’s low in calories and provides fiber, vitamins (like vitamin C and K), and antioxidants from garlic, ginger, and chili. As a fermented food, it also contains live lactic acid bacteria and beneficial compounds.
Some studies on fermented foods and gut health are promising, but research is ongoing, and kimchi isn’t a cure-all. Keep in mind:
- Sodium: Kimchi can be high in salt. If you have high blood pressure or kidney problems, keep portions moderate and talk to your doctor.
- Digestive sensitivity: If you have IBS, histamine intolerance, or reflux, spicy fermented foods might trigger symptoms.
- Pregnancy and immunity: Properly made kimchi is generally considered safe, but those with weakened immune systems or pregnancy concerns should discuss fermented foods with their healthcare provider.
If you’d like to learn how food affects your stress levels, you might like our guide to lowering cortisol naturally, which includes fermented foods as part of a gut-supportive diet. For general food safety guidance on home fermenting, the USDA Food Safety and Inspection Service is a trustworthy resource.
Make-Ahead and Batch Tips
- Make a big batch on a weekend, and divide it into smaller jars so you open only one at a time.
- Label each jar with the date.
- Start a “kimchi rotation”: while one jar is fermenting in the fridge, make the next.
- Save the brine. It’s great in soups, fried rice, and even Bloody Marys.
Frequently Asked Questions
How long does it take to make kimchi?
About 3 hours of active and waiting time on day one, then 1 to 3 days of fermenting at room temperature. After that, it keeps improving in the fridge.
Can I make kimchi without fish sauce?
Absolutely. Use soy sauce, miso, and a bit of kombu for a savory, vegan version.
Do I need to use rice flour porridge?
It isn’t mandatory, but it helps the paste cling to the leaves and gives a smoother flavor. You can skip it and use a little grated apple or pear for sugar instead.
Why is my kimchi fizzy?
That’s carbon dioxide from active fermentation. It’s a good sign.
Is it safe to eat kimchi that’s been left out for a week?
In cool weather, kimchi might ferment longer, but a week at room temperature is usually too sour and risky for beginners. Move it to the fridge after 1 to 3 days and use your senses. If anything smells or looks off, discard it.
Can I reuse the jar?
Yes, just wash it thoroughly with hot, soapy water and dry it before the next batch.
Final Thoughts
Making kimchi at home is less about following a rigid recipe and more about learning to trust your senses. Salt the cabbage, build a flavorful paste, pack it tightly, and let time do its work. Your first batch might be a little too salty or a little too sour, and that’s totally fine. By the second or third, you’ll start making it your own.
Once you’ve made your first jar, you’ll never look at store-bought kimchi the same way. Grab a cabbage, put on some music, and enjoy the process.
Disclaimer: This recipe is for general informational purposes. Follow safe food-handling practices, and consult a healthcare professional if you have dietary restrictions or medical concerns.